Experiments in Ray-Tracing, Part 8 - Anti-Aliasing
This is a very old article, included for historical interest only!
In this article I’ll explain how to perform anti-aliasing quickly, getting 5x sampling for a cost of just 2x the time.
Anti-aliasing is a technique to remove the “jaggies” in a rendered image. Let’s start with the standard shiny-balls-on-a-chessboard:
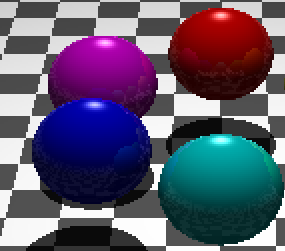
I’ve zoomed into the image a little, so that you can see the pixellated edges.
Anti-aliasing is most simply achieved by multi-sampling each pixel. Instead of casting one ray through the center of each pixel, you cast several rays (say around four), distributed within the pixel area. (You might want to distribute them in a grid, or you might want to distribute them randomly). We then take the average color value of each of those tracings.
Obviously however, this is going to slow down rendering - if I use 4x anti-aliasing, then the render will take four times as long. Not good. I can be a bit smarter about it though.
Looking at the image above, it’s only really the edges that are “jaggy” and need anti-aliasing. Everywhere else could be left alone really. So rather than tracing multiple rays through every single pixel, I just need to identify the edges. This is really easy and fast. Assuming I have a (non anti-aliased) rendered image, I can compute an "edge factor" for a single pixel as follows:
var g = Math.Abs( ( p1 + 2 * p2 + p3 ) - ( p7 + 2 * p8 + p9 ) )
      + Math.Abs( ( p3 + 2 * p6 + p9 ) - ( p1 + 2 * p4 + p7 ) );
Where p1..p9 are the pixel values around the pixel in question - p1 is above and to the left, p5 is the pixel itself, and p9 is below and to the right. (I perform this calculation on the intensity of the pixels, to avoid having to deal with RGB values).
This is the Sobel operator - there are other faster edge detection operators, but this one seemed to work nicely for me.
If g is bigger that some value (say 0.5), we consider the pixel to be part of an edge. In the following image, I’ve displayed the edges in red:
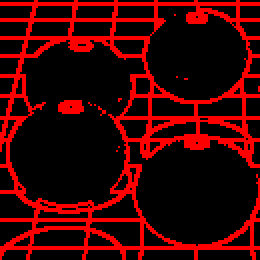
(Of course, in normal use you’d actually save the edge flags into a separate store, rather than overwriting your rendered image, but I’ve done this here for debugging).
So now, wherever I’ve detected an edge pixel in my status buffer, I cast a further four rays through it, and average them with the single ray I’ve already done prior to edge-detection:
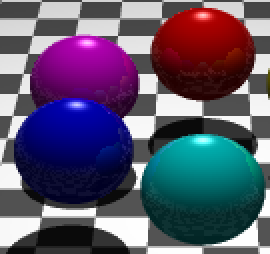
I find that I can achieve 5x anti-aliasing for just a doubling in render time.
Published: Sunday, August 31, 2008
You may be interested in...
Hackification.io is a participant in the Amazon Services LLC Associates Program, an affiliate advertising program designed to provide a means for sites to earn advertising fees by advertising and linking to amazon.com. I may earn a small commission for my endorsement, recommendation, testimonial, and/or link to any products or services from this website.