Experiments in Ray-Tracing, Part 9 - Interpolation
This is a very old article, included for historical interest only!
In this article I’m going to present a technique that trades lower image quality for faster rendering time: interpolation.
Instead of ray-tracing every single pixel, we instead start by tracing pixels in an evenly-spaced grid, say every two or four pixels. (So if we have an interpolation step of two, we trace one out of every four pixels, and if we have an interpolation step of four, we trace one out of every sixteen pixels).
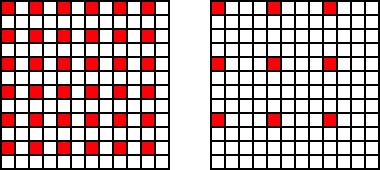
The image on the left above represents the pixels that would be traced with an interpolation step of two; the image on the right, an interpolation step of four.
Once we’ve performed this initial trace, we then examine each square region formed by the grid of traced pixels. For each square region, there are two cases to consider:
- The four corner colors are roughly the same;
- The four corner colors differ.
Based on these two cases, we take one of two actions:
- If the four corner colors are roughly the same, we can save time by interpolating (estimating) the colors for the remaining pixels from the four corners.
- If the corner colors differ, then we need to trace the rest of the pixels in the square region normally.
(Alternatively for option two and a large interpolation step, we could subdivide the square and apply the same algorithm with a halved interpolation step).
(As an added bonus, if we want to anti-alias the scene, we only need to anti-alias the pixels in a square that we aren’t interpolating).
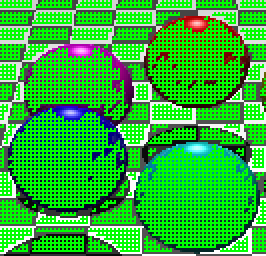
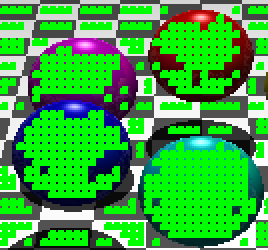
As an example, I’ve added debug code to display the interpolated pixels as green in my usual shiny-spheres-on-a-chessboard scene; interpolate step of two above, interpolate step of four below:
So what sort of speed-ups have I seen? Well, I haven’t put much effort into optimizing my interpolation algorithm, since I’m moving onto radiosity, but here’s some numbers:
- No interpolation: 360ms
- Interpolation of two: 200ms
- Interpolation of four: 230ms
- Interpolation of eight: 310ms
As you can see, there’s an optimal interpolation step, in this case, of two. As the interpolation step increases, it becomes more likely that the colors at the corner of each square will differ, and so less interpolation will happen. Higher interpolation steps are also more likely to introduce artifacts into the image.
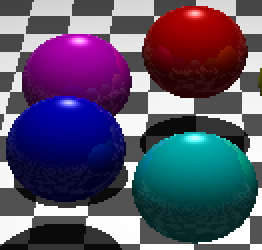
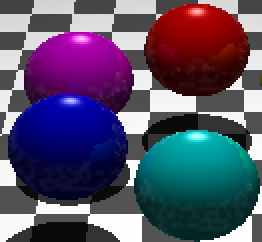
As I mentioned at the start, this technique does trade off image quality for speed. In the images below, the upper image is properly traced; the lower one has been interpolated with a step of two. You will be able to see some blurring of the reflection of the chessboard in the spheres.
Published: Sunday, September 07, 2008
You may be interested in...
Hackification.io is a participant in the Amazon Services LLC Associates Program, an affiliate advertising program designed to provide a means for sites to earn advertising fees by advertising and linking to amazon.com. I may earn a small commission for my endorsement, recommendation, testimonial, and/or link to any products or services from this website.